How to Clean Resin Planters Without Scrubbing
Table of Contents
- Why Resin Planters Need Special Care
- How to Clean Plastic Plant Pots Using the Soak Method
- How to Remove Algae from Plastic Pots Without Scrubbing
- How to Remove Hard Water Stains from Planters
- Resin-Safe Cleaners and Chemicals to Avoid
- When to Disinfect Versus When Cleaning Is Enough
- Maintenance Schedule to Prevent Buildup
- Frequently Asked Questions
Last Updated: October 17, 2026
Why Resin Planters Need Special Care
Resin planters are durable and lightweight, but soil residue, algae, mineral deposits, and plant debris accumulate on clean resin planters' surfaces and inside drainage holes, staining them and breeding mold and mildew if left untreated.
You don't need a scrub brush or harsh chemicals to restore them. Our resin planters are designed to be easy to clean and reusable for years, just match the method to the buildup.
Most people assume cleaning a resin planter means scrubbing hard. That's wrong: aggressive scrubbing scratches the finish, fades colors, and wears away the protective layer. A gentler soak-and-rinse works better and takes less effort.
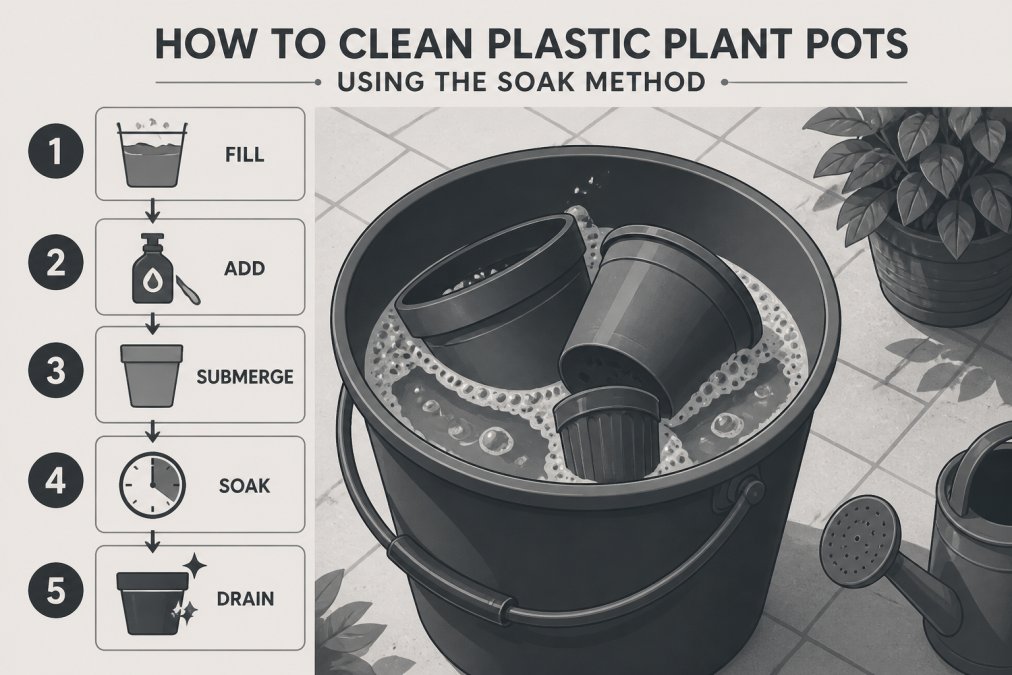
How to Clean Plastic Plant Pots Using the Soak Method
The soak method is the simplest no-scrub approach for resin planters, but resin behaves differently from terracotta. It's nonporous, so water and cleaner sit on the surface instead of soaking in. The soak is a controlled dwell time: softening the bond between residue and the smooth surface so a wipe can lift it.
Why resin responds well to soaking
Resin planters are molded from polypropylene, polyethylene, or a polyresin blend, low surface energy, closed surface, so soil film, algae, and mineral scale cling to the top layer rather than penetrating. Warm water plus a mild surfactant creeps under the residue edge; given 15-20 minutes, most organic film releases on its own. Hard-water scale needs an acid (see the vinegar section), not a surfactant.
The resin-safe soak, step by step
Step 2: Pre-wet and load the planter. Set it in the water so the waterline covers the soil ring and drainage holes.
Step 3: Let it dwell for 15-20 minutes. Do not agitate.
Step 4: Wipe with a soft cloth or non-abrasive sponge. Use microfiber, a soft cellulose sponge, or a silicone spatula for the rim.
Step 5: Rinse until the water runs clear. Rinse interior, exterior, rim, and drainage holes, leftover soap film attracts dust and hazes dark resin.
Step 6: Dry completely, including the drainage holes. Set the planter upside down on a rack; direct sun speeds drying and inhibits algae.
The in-place method for large or fixed planters
Bulky or bolted-down outdoor planters don't need lifting. Use this spray-and-wipe approach:
- Protect the plant. Cover the soil surface with a plastic sheet or slip a trash bag over the plant and tie it at the base.
- Pre-wet the exterior with a hose on a gentle shower setting. Pre-wetting prevents cleaner from drying too fast and streaking.
- Apply a mild soap solution with a pump sprayer (about 1 teaspoon of mild dish soap per quart of water).
- Let it dwell 10-15 minutes, then wipe with a soft cloth on a long handle. For the rim and drainage area, use a soft bottle brush or a rag wrapped around a dowel.
- Rinse with the hose, working top to bottom, and let it air dry.
Residue-by-residue cheat sheet
| Residue | What it looks like | No-scrub approach | Dwell time |
|---|---|---|---|
| Soil film | Brown-gray haze at the soil line | Warm water + mild soap soak | 15-20 min |
| Algae | Green or brownish slick, often in shade | 1:1 white vinegar and water spray | 5-10 min |
| Hard-water marks | White chalky rings or spots | 1:1 white vinegar and water, or full-strength vinegar on a rag | 15-30 min |
| Sap or sticky residue | Amber or clear tacky spots | Warm soapy soak, then a cloth dampened with rubbing alcohol (test first) | 10-15 min |
| Fertilizer salt crust | White crystalline edge at drainage holes | Warm water soak, then vinegar spray | 15-20 min |
How to Remove Algae from Plastic Pots Without Scrubbing
Algae appears as a green or brownish film on pots that sit in shade or stay moist.
Step 2: Spray the affected areas generously. Coat the algae-covered sections and let sit 5-10 minutes; the vinegar starts breaking it down immediately.
Step 4: Rinse with clear water. Rinse thoroughly to remove all vinegar residue; the smell fades as it dries, but rinsing speeds that up.
Step 5: Dry in sunlight. Direct sun naturally inhibits algae regrowth, helping prevent the problem from returning quickly.
For heavy algae that resists vinegar, a weak bleach solution (1 part bleach to 9 parts water) is a last resort.
How to Remove Hard Water Stains from Planters
Hard water stains are white, chalky deposits left when mineral-rich water evaporates, leaving calcium and magnesium residue.
Step 1: Soak the planter in vinegar solution. Mix equal parts white vinegar and water.
Step 3: Wipe gently. Most stains come off with light pressure from a soft cloth.
Step 5: Dry completely. Air dry in sunlight or use a clean cloth; sun helps prevent new water spots.
For severe mineral buildup that resists vinegar, a commercial hard water stain remover designed for plastic surfaces can be used.
Resin-Safe Cleaners and Chemicals to Avoid
Not all cleaning products are safe for resin planters. Some can degrade the plastic, fade colors, or leave permanent residue.
Austin Planter 2 inch Wavy with Saucers 5 Pack Sea Blue →
Safe cleaners for resin planters:
- Mild dish soap (the gentlest option)
- White vinegar (natural and effective for algae and mineral deposits)
- Water alone (for light dust and debris)
- Baking soda paste (for stubborn organic stains; use with minimal scrubbing)
Cleaners to avoid:
- Bleach (can fade bright colors; use only as a last resort on older planters)
- Acetone or nail polish remover (dissolves resin plastic)
- Abrasive scouring powders (scratch the surface finish)
- Harsh degreasers or industrial solvents (damage the protective coating)
- Pressure washers on high settings (can crack or warp thin plastic)
- Ammonia-based cleaners (can discolor resin over time)
The safest approach is to start with warm water and mild soap, then try vinegar. Only move to stronger solutions if gentler methods fail, and always test on a hidden area first.
When to Disinfect Versus When Cleaning Is Enough
Cleaning removes dirt, algae, and stains. Disinfecting kills bacteria and fungi that could spread disease to new plants.
Clean your planters when:
- Moving plants between pots
- Routine seasonal maintenance
- Removing visible dirt, algae, or mineral deposits
- Before storing planters for the off-season
Disinfect your planters when:
- A plant in the pot died from disease (root rot, damping off, fungal infection)
- You're reusing a pot that held a diseased plant
- Moving plants from an infected garden bed to new pots
- Starting seeds in reused containers
To disinfect without scrubbing, soak planters in a weak bleach solution (1 part bleach to 9 parts water) for 10 minutes, or in 1 part white vinegar to 1 part water for 20-30 minutes. Both kill most pathogens without scrubbing.
After disinfecting, rinse thoroughly and allow to air dry completely before planting. Residual bleach or vinegar can harm new plants if not fully rinsed away.
Maintenance Schedule to Prevent Buildup
A maintenance schedule only saves scrubbing if it targets how resin planters actually get dirty. Resin is nonporous, so most buildup starts at three places: the soil line, the drainage holes, and the waterline inside a saucer. Build your routine around those hot spots and you can skip heavy cleaning most of the time.
The 60-second weekly rinse
Once a week during the growing season, rinse each planter's exterior with a hose on a gentle shower setting and let it air dry, removing dust and fresh pollen before it bonds. Wipe the rim and the area just above the soil line with a damp microfiber cloth. Empty saucers so standing water doesn't breed algae. Clear soil plugs from drainage holes with a finger or bamboo skewer. This single habit prevents most of the film that otherwise requires a soak.
Monthly deep-clean trigger
Do a full soak when you see any of these:
- A visible soil ring at the soil line that a damp cloth will not lift
- Green or brownish algae film on the shaded side
- White chalky rings from hard water
- White salt crust at the drainage holes
If none of those are present, the weekly rinse is enough. This is the cleaning-versus-disinfecting line: routine film is a cleaning problem, not a sanitizing problem.
Seasonal transitions
Spring (before planting): Soak empty planters 15-20 minutes in warm soapy water, rinse, and dry fully. Clear drainage holes.
Summer: Keep up the weekly rinse. In hot, dry climates, hard-water marks appear faster; a monthly vinegar spray on the exterior keeps them from hardening into scale.
Fall (before storage): Empty soil completely, rinse out root and soil debris, and soak. Dry upside down on a rack so water leaves the drainage holes.
Winter: Store in a dry, covered location. Resin handles freeze-thaw cycles well, but a planter left full of wet soil can crack from ice expansion. Empty and dry before the first hard freeze.
Between plantings
When you swap plants, treat the empty pot to a quick routine: empty soil, rinse, soak 15-20 minutes in warm soapy water, wipe the rim and drainage holes, rinse until clear, and dry completely before refilling. This is also the moment to check for hairline cracks around the drainage holes, the most common failure point on resin planters.
Prevention tactics specific to resin
- Keep planters out of constant shade where possible. Algae needs moisture and low light; a sunnier spot dries faster between waterings.
- Use saucers sparingly outdoors. Standing water in a saucer is an algae reservoir. Empty saucers after rain.
- Avoid overwatering. Soggy soil keeps the soil line wet, which is where film starts.
- Do not stack damp planters. Dry each one fully, including the drainage holes, before nesting.
- Skip abrasive tools entirely. Micro-scratches from scouring pads give algae and mineral scale a place to grip, making future cleaning harder.
- Rinse after fertilizing. Fertilizer salts that splash onto the rim and exterior dry into crust; a quick rinse right after feeding prevents it.
Quick reference
| Frequency | Task | Time |
|---|---|---|
| Weekly (growing season) | Rinse exterior, wipe rim, empty saucers, check drainage | About 1 minute per planter |
| Monthly | Vinegar spray on hard-water marks and algae; spot-soak if film persists | 10-20 minutes |
| Seasonal | Full soak, inspect, disinfect if disease history | 30-45 minutes |
| Between plantings | Empty, soak, rinse, dry, inspect drainage holes | 20-30 minutes |
Our Austin Planter line comes in multiple sizes and colors, with drainage holes already drilled. The 95% recycled polypropylene material resists fading and won't crack in freeze-thaw cycles, so your investment lasts for years.

Frequently Asked Questions
What is the safest cleaner to use on resin planters?
Mild dish soap and warm water is the safest option for resin planters. Mix one tablespoon of dish soap per gallon of water. Vinegar (1 part vinegar to 3 parts water) also works well for removing mineral deposits without damaging the surface. Avoid bleach, harsh solvents, and abrasive powders, as these can degrade the resin finish and discolor the planter over time.
Can vinegar remove algae from plastic planters?
Yes. Vinegar is effective for removing algae from plastic pots without scrubbing. Mix equal parts white vinegar and water in a spray bottle, spray the affected areas, and let it sit for 15-20 minutes. Wipe gently with a soft cloth or sponge. For stubborn algae, soak the planter in a vinegar solution for 1-2 hours, then rinse thoroughly with clear water and dry completely.
How do you sterilize plant pots before reusing them?
Soak resin planters in a diluted bleach solution (1 part bleach to 10 parts water) for 10-15 minutes to disinfect, then rinse thoroughly multiple times with clear water until no bleach smell remains. Allow to air dry completely in direct sunlight before reusing. This method eliminates plant disease pathogens without harsh scrubbing that could damage the resin surface.
How do you prevent dirt and algae from building up on planters?
Store planters in a dry location when not in use, rinse them with clear water after watering plants, and allow them to dry completely between uses. Minimize standing water in saucers, as this promotes algae and mildew growth. A quick monthly rinse with mild soap and water prevents organic residue and mineral deposits from accumulating, keeping resin planters looking fresh.
